The screen-printing process
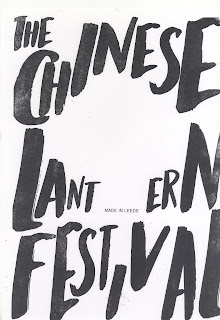
While designing the poster, remembering this would be a screen-printed outcome considerations had to be taken into how the design would be made using this process. Due to this design not having any overlaps and only using two colours, the design was not as complicated as other designs might have been.
- The process involved first pulling apart the design into the two colours and converting them into a stencil.
- A mesh screen is used to transfer the ink onto a substrate, except in areas made impermeable to the ink by a blocking stencil.
- A screen is made of a piece of mesh stretched over a frame.
- A stencil is formed by blocking off parts of the screen in the negative image of the design to be printed; that is, the open spaces are where the ink will appear on the substrate.
- Before printing occurs, the frame and screen must undergo the pre-press process, in which an emulsion is ‘scooped’ across the mesh
- the ‘exposure unit’ burns away the unnecessary emulsion leaving behind a clean area in the mesh with the identical shape as the desired image.
- A stencil is formed by blocking off parts of the screen in the negative image of the design to be printed; that is, the open spaces are where the ink will appear on the substrate.
the ‘exposure unit’ burns away the unnecessary emulsion leaving behind a clean area in the mesh with the identical shape as the desired image.
- A stencil is formed by blocking off parts of the screen in the negative image of the design to be printed; that is, the open spaces are where the ink will appear on the substrate.
During the process having to line up the first colour in line with the second colour was unsuccessful a few times. As well as this, the ink was not being converter to the paper from the screen fully and therefore gave the poster a more textured affect. This problem mainly occurred from there being too much emulsion coated on the screen, also it was not washed


No comments:
Post a Comment